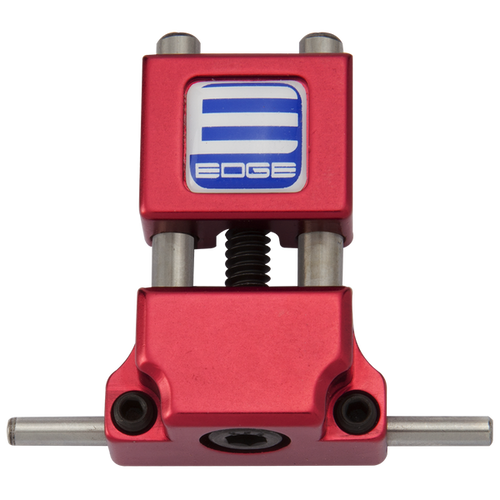
Edge Vise Square - 40-000
Product Description
The Vise Square by Edge Technology will give you a more reliable method to quickly and accurately align the vise to the mill table. The conventional alignment procedure is long and painful requiring a never ending series of adjustments made to the vise combined with cranking the table back and forth to check the results of those adjustments. This process is repeated over and over until you either get lucky or give up and call it good enough.
The Vise Square eliminates the guesswork by allowing you to monitor the movement of right side and left side of the vise jaw simultaneously. Use your spindle mounted test style indicator to monitor the left side of the jaw while the high precision 0.0005" indicator mounted in the Vise Square monitors the right side of the jaw. This dual indicator configuration makes the process very straight forward and repeatable.
The Vise Square rigidly attaches to the mill table in just a few seconds. Each leg of the Vise Square has a solid ball tip set screw on one side and a spring loaded ball tip set screw on the opposite side. These set screws accurately position the Vise Square in the T-slot. The feet of the Vise Square are parallel to the T-slot during installation. After the feet are in the T-slot they are rotated 90 degrees allowing them to clamp to the underside of the T-slot.
Before the indicators are used for final alignment the vise is roughly aligned within a few thousands of an inch by simply pushing the rear jaw up against the back of the Vise Square. The mounting hardware of the vise is then lightly tightened and the rear vise jaw is cranked back to make room for adjustments made during the final alignment.
Before final alignment the test style indicator in the spindle needs to be synchronized with the indicator in the Vise Square. This step is fast and easy, simply zero both indicators on the right side of the vise jaw. The test style indicator in the spindle can then be moved to the left side of the vise jaw for final alignment.
The last step is to adjust the vise until both indicators read the same number. The indicators do not need to read zero, they just need to read the same number. This step is also straight forward and easy. Since the indicators are monitoring both the left side and the right side of the vise jaw you will always know which way and how hard to tap the vise. The amount of tapping required is reduced dramatically compared to conventional alignment methods being used.
The Vise Square will standardize the process your shop uses to install vises and it will achieve perfect results every time. If you want to spend less time on setup and more time machining parts then you need the Vise Square by Edge Technology.
Key Features
• 0.0005" graduation indicator.
• Rigidly mounts to the T-slots in mill table.
• High strength alloy construction.
• Detent ball set screws used for precision alignment in T-slot.
• Compatibility:
Works with 6" vise widths only.
Does not work with rotating vise base plates.
Works with 5/8" T-slot widths only.
For an instructional video on this product Click Here


